
By RunningRoo Auto Parts — written from the desk of our Product Manager
Installing a timing chain kit is one of the most rewarding and most unforgiving jobs on an engine. Done correctly, it restores precise valve timing and quiet, reliable running for years. Done incorrectly — a missed timing mark or a wrong torque — it can bend valves and destroy the engine on the first start. This guide explains what the job involves, the tools you need and the step-by-step process, so you can decide whether to tackle it yourself or hand it to a professional.
RunningRoo Auto Parts – Based in Melbourne, Australia 🇦🇺
📞 Free 24/7 Pickup Available (Contact 0425890125)
💬 Any questions? Message or Call us anytime! We’re here to help.Why Choose RunningRoo?
✅ Aussie Owned & Operated | 🚚 Fast Shipping | 🤝 Friendly Support
Why timing chains need kits, not just chains
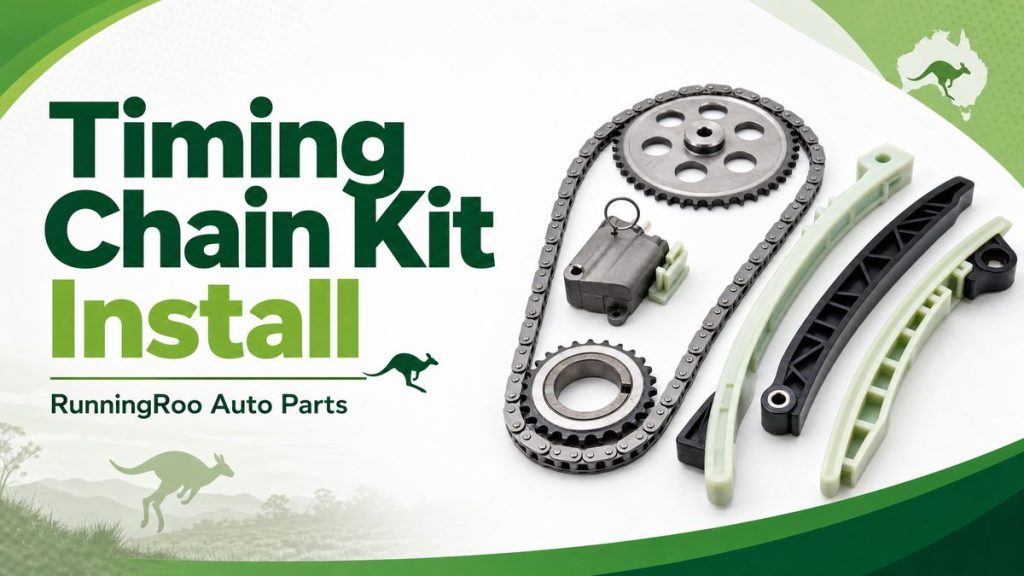
A timing chain is rarely replaced alone, because the tensioner, guide rails and sprockets wear together with the chain. A complete kit renews the whole system in one job — the chain, the updated tensioner, the plastic guides and the sprockets or gears — plus the seals and fasteners needed to reseal the engine. Replacing only the chain while reusing worn guides or a tired tensioner is a known cause of early failure.
The kit also matters because manufacturers revise tensioners and guides during an engine’s life to fix known weaknesses. A quality kit from a reputable supplier includes the updated parts, so your “aftermarket” kit can be better than the original.
The tools you need
The essential tools are the correct timing-locking and alignment tools for the engine, a torque wrench, a full socket and Torx set, and a clean workspace. On many engines the crank and camshafts must be locked in position before the chain is removed, so the locking tools are not optional. A scan tool is useful afterwards to clear codes and, on VVT engines, to run the adaptation.
The table below lists the core items and why each matters.
| Tool | Why it matters |
|---|---|
| Timing-locking tools | Hold crank and cams in correct position |
| Torque wrench | Correct tensioner and sprocket torque |
| Socket / Torx set | Remove covers, bolts and sprockets |
| Clean work area | Keeps grit out of the oil galleries |
| Scan tool | Clear codes and re-learn VVT |
The step-by-step process
Start by disconnecting the battery, draining the engine oil if the covers share the sump, and removing the accessories and covers needed to reach the chain. Lock the crankshaft and camshafts with the correct tools, then remove the tensioner, guides, chain and sprockets, taking note of the chain’s exact routing before removal.
Fit the new sprockets, route the new chain exactly as the old one ran, fit the new guides and tensioner, and torque every bolt to specification. Turn the engine over by hand at least two full revolutions to confirm the timing marks line up and there is no valve-to-piston contact, then refit the covers with new seals and sealant where specified.
The most common mistakes
The first mistake is rushing the timing marks, which can bend valves. The second is reusing old guides or a weak tensioner to save money, which fails early. The third is incorrect torque on the tensioner or sprockets, and the fourth is skipping the hand-rotation check before the first start. Each of these is avoidable with care, and each can turn a straightforward kit job into an engine rebuild.
Front vs rear chains
The location of the timing chain changes the difficulty of the job enormously. A front-mounted chain is relatively accessible after the front covers and accessories come off. A rear-mounted chain — common on transverse engines such as the EA888 and many V6s — sits against the transmission side, and reaching it often means removing the engine or transmission, which makes the labour far more significant.
Knowing where your chain lives sets realistic expectations for the job’s difficulty and cost. A front chain is often a full-day DIY job, while a rear chain is usually a workshop job with substantially more labour.
VVT and oil-pump chain renewal
On engines with VVT, the cam phasers should be inspected and renewed if worn while the timing system is open, because reaching them again later means repeating the labour. The same applies to the oil-pump or balance-shaft chain on engines that drive them separately — those chains and their tensioners are renewed as part of a complete kit.
This is why a quality timing chain kit often includes the VVT gears and the oil-pump chain, and why a “chain only” purchase is a false economy on these engines.
After installation: first start and checks
After the timing is set and the covers are back on, turn the engine over by hand before starting to confirm there is no valve-to-piston contact. On the first start, listen for any rattle and watch for oil or coolant leaks around the freshly sealed covers. Clear any stored fault codes and, on VVT engines, run the adaptation.
A clean first start with no rattle and no leaks confirms the job was done correctly. Re-check the oil level after the first run, because the timing covers and oil galleries will have taken some oil.
Torque and sequence specifics
Timing chain components have specific torque values and tightening sequences, and getting them wrong can misalign the tensioner or damage a guide. The tensioner in particular has a preload procedure that must be followed, and many sprocket bolts are angle-tightened in stages rather than torqued to a single figure.
Always follow the workshop procedure for your engine, and use a torque wrench in good calibration. Guessing torque on a timing job is one of the fastest ways to turn a successful repair into a repeat failure.
Key takeaways
Installing a timing chain kit is a precision job whose success depends on the correct locking tools, the correct torque and sequence, and renewing the whole system — chain, tensioner, guides and sprockets — together. The hand-rotation check before the first start is the single most important safety step, because it catches a timing error before it damages the engine.
For most owners, the best value is a quality kit matched by engine code, fitted carefully with the correct tools, or handed to a professional for the timing stage. Done once and done correctly, a timing chain kit restores quiet, reliable running for years.
Choosing between DIY and professional
The decision between DIY and a workshop comes down to the tools, the engine layout and your confidence with timing-critical work. A front-mounted chain with good access and the correct locking tools is a realistic DIY job for an experienced mechanic. A rear-mounted chain, or an engine you are unfamiliar with, is better handed to a professional.
There is a middle path that many owners use: buy the quality kit yourself to control the parts cost, and have a workshop do the timing-critical installation. That way you avoid paying a parts markup while leaving the precision work to someone who does it every day.
Quick reference: installation checklist
Work through this list for a clean timing chain installation:
- Disconnect the battery and drain the oil or coolant where required.
- Lock the crankshaft and camshafts with the correct tools before removing anything.
- Note the exact routing of the old chain before removal.
- Renew the chain, tensioner, guides and sprockets as a complete kit.
- Torque every bolt to specification and in the correct sequence.
- Turn the engine over by hand at least two full revolutions.
- Reseal the covers with new gaskets or sealant.
- Refill fluids, clear codes and run the VVT adaptation where applicable.
A disciplined, checklist-driven approach is what separates a timing chain job that lasts for years from one that returns with a rattle or a leak.
Frequently asked questions
Can I install a timing chain kit myself?
It is an advanced job. A careful DIYer with the correct locking tools can do it, but many owners use a professional for at least the timing stage.
What is included in a timing chain kit?
A complete kit includes the chain, tensioner, guide rails, sprockets or gears, and the seals and fasteners needed to reseal the engine.
Do I need special tools for a timing chain job?
Yes. The correct timing-locking tools are essential, because getting the valve timing wrong can destroy the engine.
Should I replace the VVT gears at the same time?
On VVT engines it is often wise to replace worn cam phasers while the timing system is open.
How long does a timing chain job take?
Usually a full day for a first-time DIY job, and several hours for a professional depending on the engine.
Is a rear-mounted chain harder to replace?
Yes, substantially. Reaching a rear chain often means removing the engine or transmission, so it is usually a workshop job.
Should I renew the oil-pump chain with the timing chain?
Yes, where the engine drives the oil pump separately, the oil-pump chain and tensioner are renewed as part of a complete kit.
Why is the hand-rotation check important?
Turning the engine over by hand before starting confirms the timing is correct and there is no valve-to-piston contact, preventing engine damage.
Should I buy the kit myself and have a workshop fit it?
That is a popular middle path — it keeps the parts cost down while leaving the timing-critical installation to a professional.
Do I need to remove the engine to fit a timing chain?
On a rear-chain engine, sometimes the engine or transmission must come out. On a front-chain engine, the chain is usually reached without removing the engine.
How do I know the timing is correct after fitting?
The timing marks must line up after the hand rotation, and the engine should start cleanly with no rattle or timing codes.
Can I reuse the timing chain tensioner?
No. The tensioner is a wear item and should be renewed with the chain as part of a complete kit.
What if I hear a rattle after the timing job?
Stop the engine and check the timing and tensioner before driving, because a rattle after a timing chain job usually means something is not correctly fitted or tensioned.
Shop the parts mentioned in this guide
- Timing Chain Kit for Hyundai i45 / Kia 2.4L G4KJ 2009–2017
- Timing Chain Kit for Mazda 3 / 5 / 6 / Tribute 2.3L with VVT 2003–2007
- Timing Chain Kit for Nissan Teana J31 / J32 VQ23DE / VQ25DE / VQ35DE
- Nissan Navara Duplex Timing Chain Kit 2.5 YD25 D40 / D22 — eBay
Watch on RunningRooAuto YouTube
- RunningRoo Auto Parts – trusted Melbourne parts support
- RunningRoo Auto Parts – product and fitment channel
RunningRoo Auto Parts – Based in Melbourne, Australia 🇦🇺
📞 Free 24/7 Pickup Available (Contact 0425890125)
💬 Any questions? Message or Call us anytime! We’re here to help.Why Choose RunningRoo?
✅ Aussie Owned & Operated | 🚚 Fast Shipping | 🤝 Friendly Support
Sources and further reading
- Timing chain — Wikipedia
- Gates — timing system products
- Cloyes — timing chain kits
- RACV — car maintenance and repair guidance
RunningRoo Auto Parts – Based in Melbourne, Australia 🇦🇺
📞 Free 24/7 Pickup Available (Contact 0425890125)
💬 Any questions? Message or Call us anytime! We’re here to help.Why Choose RunningRoo?
✅ Aussie Owned & Operated | 🚚 Fast Shipping | 🤝 Friendly Support